How to set up a Polkadot wallet: A step-by-step guide
New to Polkadot? This beginner-friendly guide walks you through how to set up a Polkadot-compatible wallet, from choosing the right option to securing your seed phrase and getting started with staking and managing your DOT.
 By Meesh Nguyen•March 31, 2025
What you can expect
- What a Polkadot wallet is and why it matters
- Why you need a Polkadot-compatible wallet
- The different options available to you
- A simple overview of how to set up your wallet
- Tips to keep your wallet safe
Getting started with Polkadot means you'll need a wallet, a secure place to store, send, receive, and manage your DOT tokens. Your Polkadot wallet isn't just a digital wallet—rather, it's your gateway to participating in the broader Polkadot ecosystem, including staking, governance, and interacting with decentralized applications (dapps).
In this guide, we'll walk you through the essentials of setting up a Polkadot wallet using popular options like Nova Wallet, Talisman, SubWallet, Fearless, and Ledger. Whether you're new to crypto or just getting started with Polkadot, here's everything you need to know to get started safely and confidently.
What is a Polkadot wallet?
Previously, we discussed how a crypto wallet serves as your all-access pass to the world of Web3. Specifically, a Polkadot wallet is your personal access point to the Polkadot network. It’s where you manage your DOT tokens and other compatible digital assets like stablecoins, NFTs, and more. It’s how you interact with the network—whether you’re staking DOT, voting on proposals, managing identities, or deploying code.
Your wallet generates four essential components:
- Public address: Also known as your wallet address, it’s a unique identifier, like your email address, for receiving onchain assets. Public addresses can be safely shared with others.
- Private key: A secret code, like your password, that’s used to access and authorize funds. Keep it safe, and NEVER share it with anyone.
- Seed phrase: Also called a recovery phrase, this is a sequence of 12-24 words that serves as a master key for your entire wallet. It can be used to recover all accounts associated with your wallet. NEVER share this phrase.
- Account: A wallet can contain one or more accounts. Each account is a public-private key pair derived from your wallet’s seed phrase. Each account has its own unique address, like a user profile, that allows you to manage assets and interact with the network.
Keep in mind: Remember that the Polkadot blockchain is a decentralized, immutable ledger, meaning that your wallet doesn’t actually hold assets. Instead, it stores the cryptographic keys needed to access and manage your onchain funds.
Why you need a Polkadot-compatible wallet
You might be wondering: Can’t I just use MetaMask to connect to Polkadot dapps?
Today, wallets like MetaMask and Zerion are designed for Ethereum and EVM-compatible (Ethereum Virtual Machine) applications that follow Ethereum’s account model, transaction structure, and smart contract environment.
But Polkadot operates differently and isn’t EVM by default. That’s why you’ll need a wallet that’s specifically built to support the Polkadot ecosystem.
Polkadot-compatible wallets are designed to:
- Connect directly to the Polkadot Chain and its rollups (fka parachains)
- Support DOT tokens and other native assets
- Enable staking, governance participation, and cross-chain transactions
- Manage Polkadot’s unique account structure and cryptographic keys (which are incompatible with Ethereum’s ‘0x’ address format)
Some multichain wallets, like Talisman and OKX, offer support for multiple blockchain environments, including Polkadot, Ethereum, Solana, and Aptos. But even if you choose a multichain wallet, it must explicitly support Polkadot.
How to find the best Polkadot wallet for you
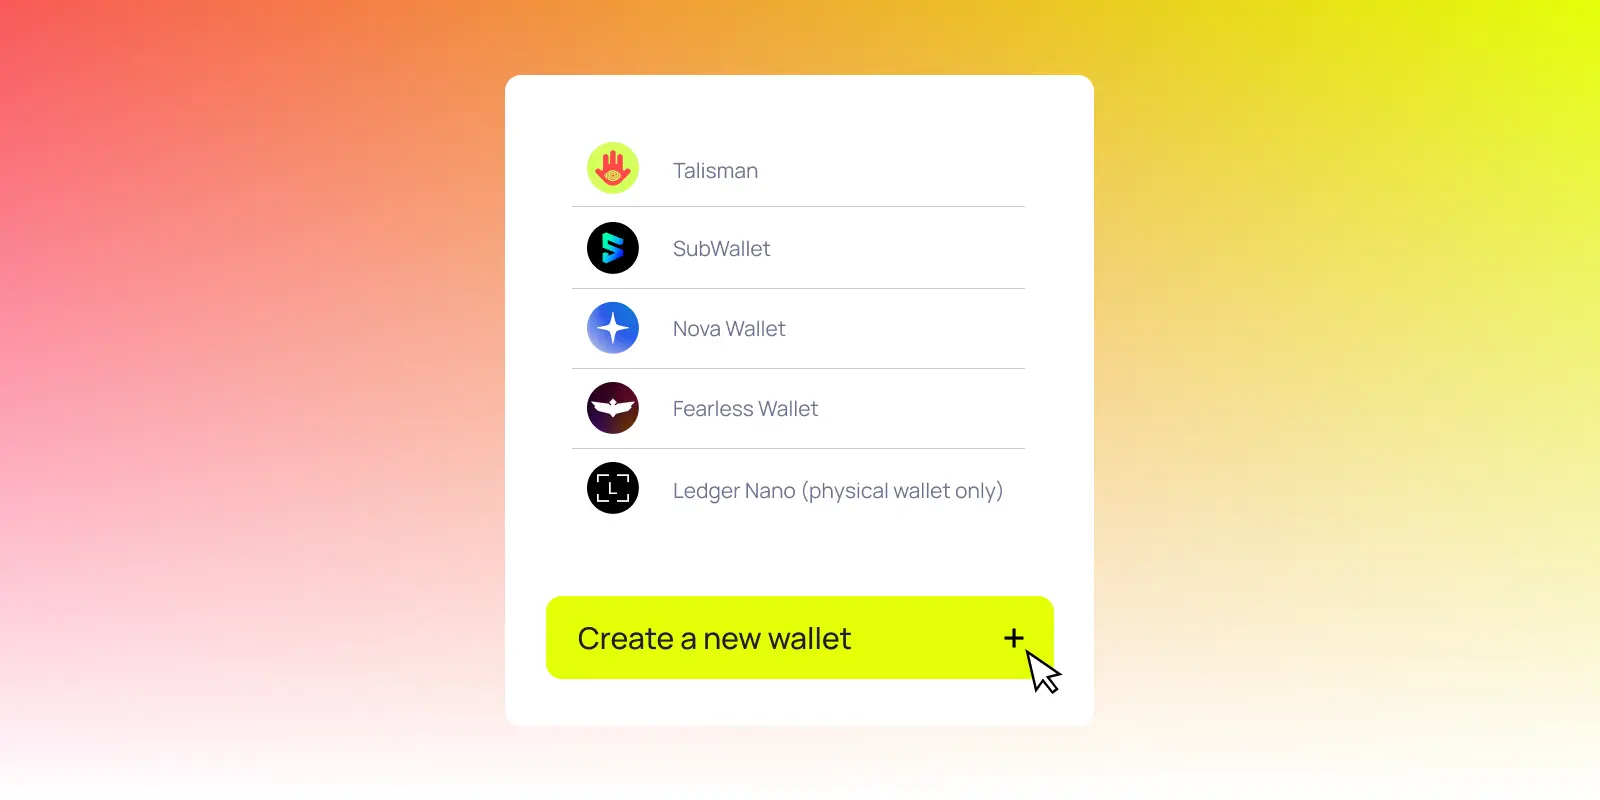
There’s no one-size-fits-all wallet. The best choice for you depends on how you plan to use Polkadot. Here’s a quick overview of some popular options to consider:
Nova Wallet
- Wallet type: Hot wallet
- Platform availability: Mobile-only (iOS/Android)
- Key features: Optimized for native in-wallet staking, user-friendly governance interface (swipe left/right to vote)
- Best for: On-the-go users who want easy staking and governance access
- Compatibility: No hardware wallet support
Talisman
- Wallet type: Hot wallet
- Platform availability: Browser extension and mobile-friendly
- Key features: Multichain support (Polkadot-native + Ethereum), built-in staking and dapp integrations
- Best for: Users who want multichain access and flexible wallet options
- Compatibility: Ledger hardware wallet support
SubWallet
- Wallet type: Hot wallet
- Platform availability: Browser extension and mobile app
- Key features: Multi-account management, staking, governance, NFT support, customizable experience
- Best for: Power users who need advanced wallet management features
- Compatibility: Ledger hardware wallet support
Fearless Wallet
- Wallet type: Hot wallet
- Platform availability: Mobile-only (iOS/Android)
- Key features: Open-source, Polkadot and Kusama-native, intuitive staking interface
- Best for: DOT and KSM holders who prefer a simple mobile wallet
- Compatibility: No hardware wallet support
Ledger
- Wallet type: Hardware (cold) wallet
- Platform availability: Hardware device (used in combination with Talisman, SubWallet, and others)
- Key features: Maximum security, offline private key storage
- Best for: Long-term holders and users managing large amounts of DOT
- Compatibility: Supported by Talisman and SubWallet
Step-by-step overview to setting up your Polkadot wallet
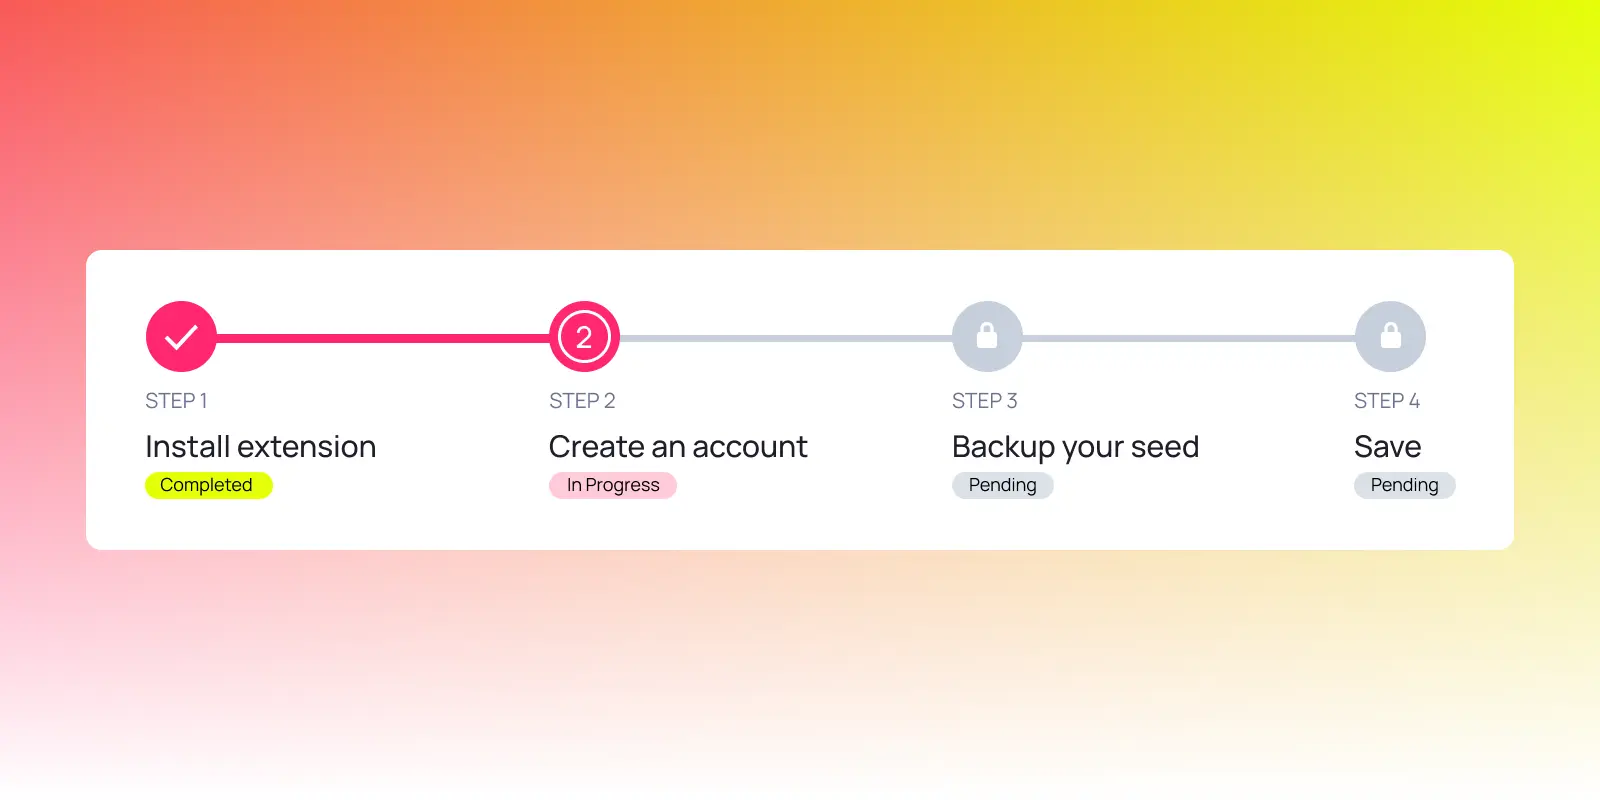
Each wallet has unique features and user interfaces, but the basic setup process is similar across Nova Wallet, Talisman, SubWallet, and Fearless.
Step 1: Download and install your wallet
- Download your wallet mobile app or browser extension from the provider’s official website:
- Mobile wallets: Nova Wallet, Fearless, SubWallet (iOS and Android)
- Browser extensions: Talisman, SubWallet (desktop browsers)
- If you’re using a Ledger hardware wallet, you’ll need to set it up using the Ledger Live app and follow the instructions specific to your device. To learn more about Polkadot’s Ledger support, check out what’s new in the Polkadot Ledger app.
Step 2: Create your wallet
- Open your installed wallet application
- Choose "Create a new wallet" or "Create a new account"
- Follow the prompts to set a secure password or PIN
Step 3: Back up your seed phrase
- Your wallet will display a seed phrase (12 to 24 words)
- Write it down and store it offline in a secure place
- Do not share this phrase with anyone. It is the only way to recover your wallet
- Confirm your seed phrase as instructed by your wallet
Step 4: Access and manage your wallet
- Log into your wallet using your password or PIN
- Locate your account and its associated public address
- Share your public wallet address to receive DOT tokens and other digital assets
- Explore features like staking, governance, and dapp connections
Start sending, receiving, and staking DOT
Once your wallet is ready, you can start using it right away.
Here’s how you can send, receive, or stake:
- Receive DOT: Share your public address with others to receive tokens
- Send DOT: Paste the recipient’s public address, enter the amount, and confirm the transaction.
- Stake DOT: Use your wallet's staking interface to nominate validators and start earning rewards. Deep dive into the different levels of staking.
Best practices for wallet security
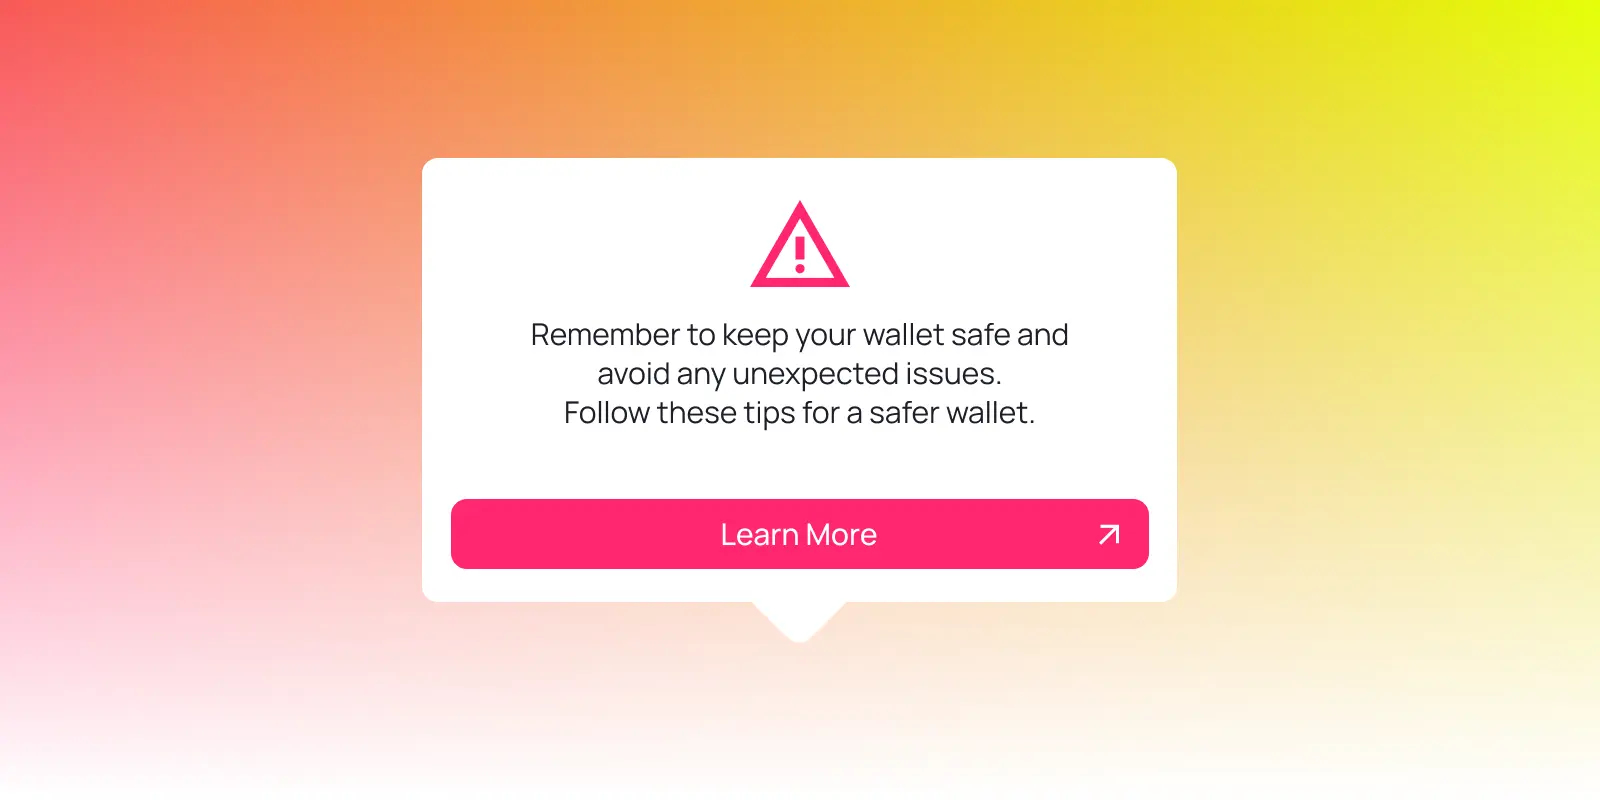
Because these wallets are self-custodial (sometimes called non-custodial), this means you are the only person who controls your private keys and assets. There is no third party holding your funds or managing your login. While this gives you full ownership and freedom, it also means you are fully responsible for keeping your wallet secure.
If you lose access to your wallet or reveal your seed phrase, no one can recover your assets for you. That’s why wallet security is critical. To protect your wallet and your funds, follow these best practices:
- Always store your seed phrase offline and in a secure place
- Never share your seed phrase or private key with anyone
- Consider using a hardware wallet, such as Ledger, for holding large amounts of DOT
- Enable biometric authentication or additional security layers if your wallet offers them
Your Polkadot wallet is the first step in taking control of your digital assets and participating in the Polkadot network. It’s more than just a tool to manage DOT—it’s your passport to staking, governance, and exploring the growing ecosystem of decentralized applications and rollups.
By following this guide and practicing good wallet security, you’re setting yourself up to engage safely and confidently in one of the most dynamic ecosystems in Web3. No matter if you’re getting ready to stake your first DOT, cast your first vote, or simply want to learn the ropes, you’re now ready to begin.
You got this! Welcome to Polkadot 🤝